

Create this cool 3D typography poster in Figma!
... in just 5 steps.

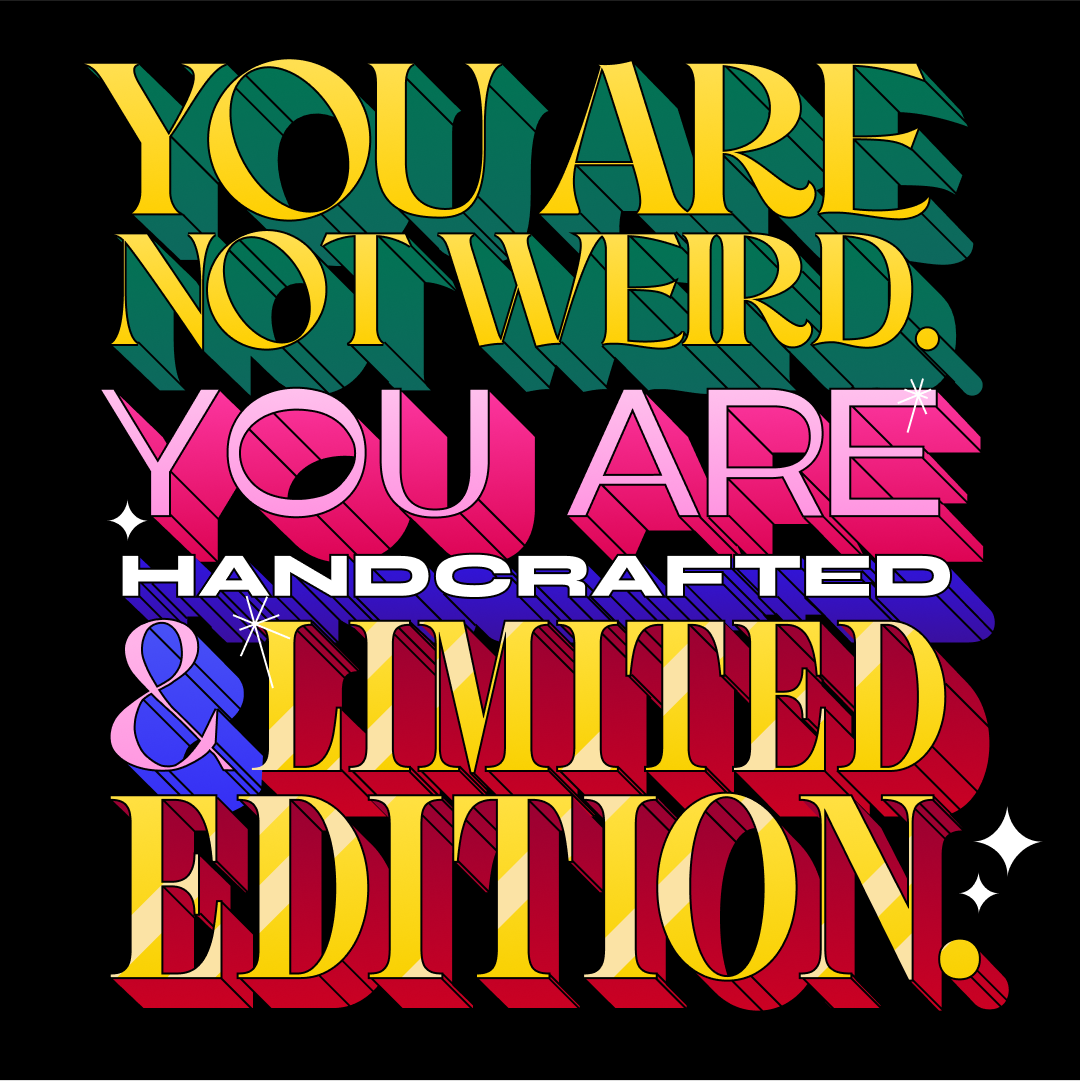
#1 : Lay your text out and pick some cool fonts
Add text blocks line by line— this is important for step 2.
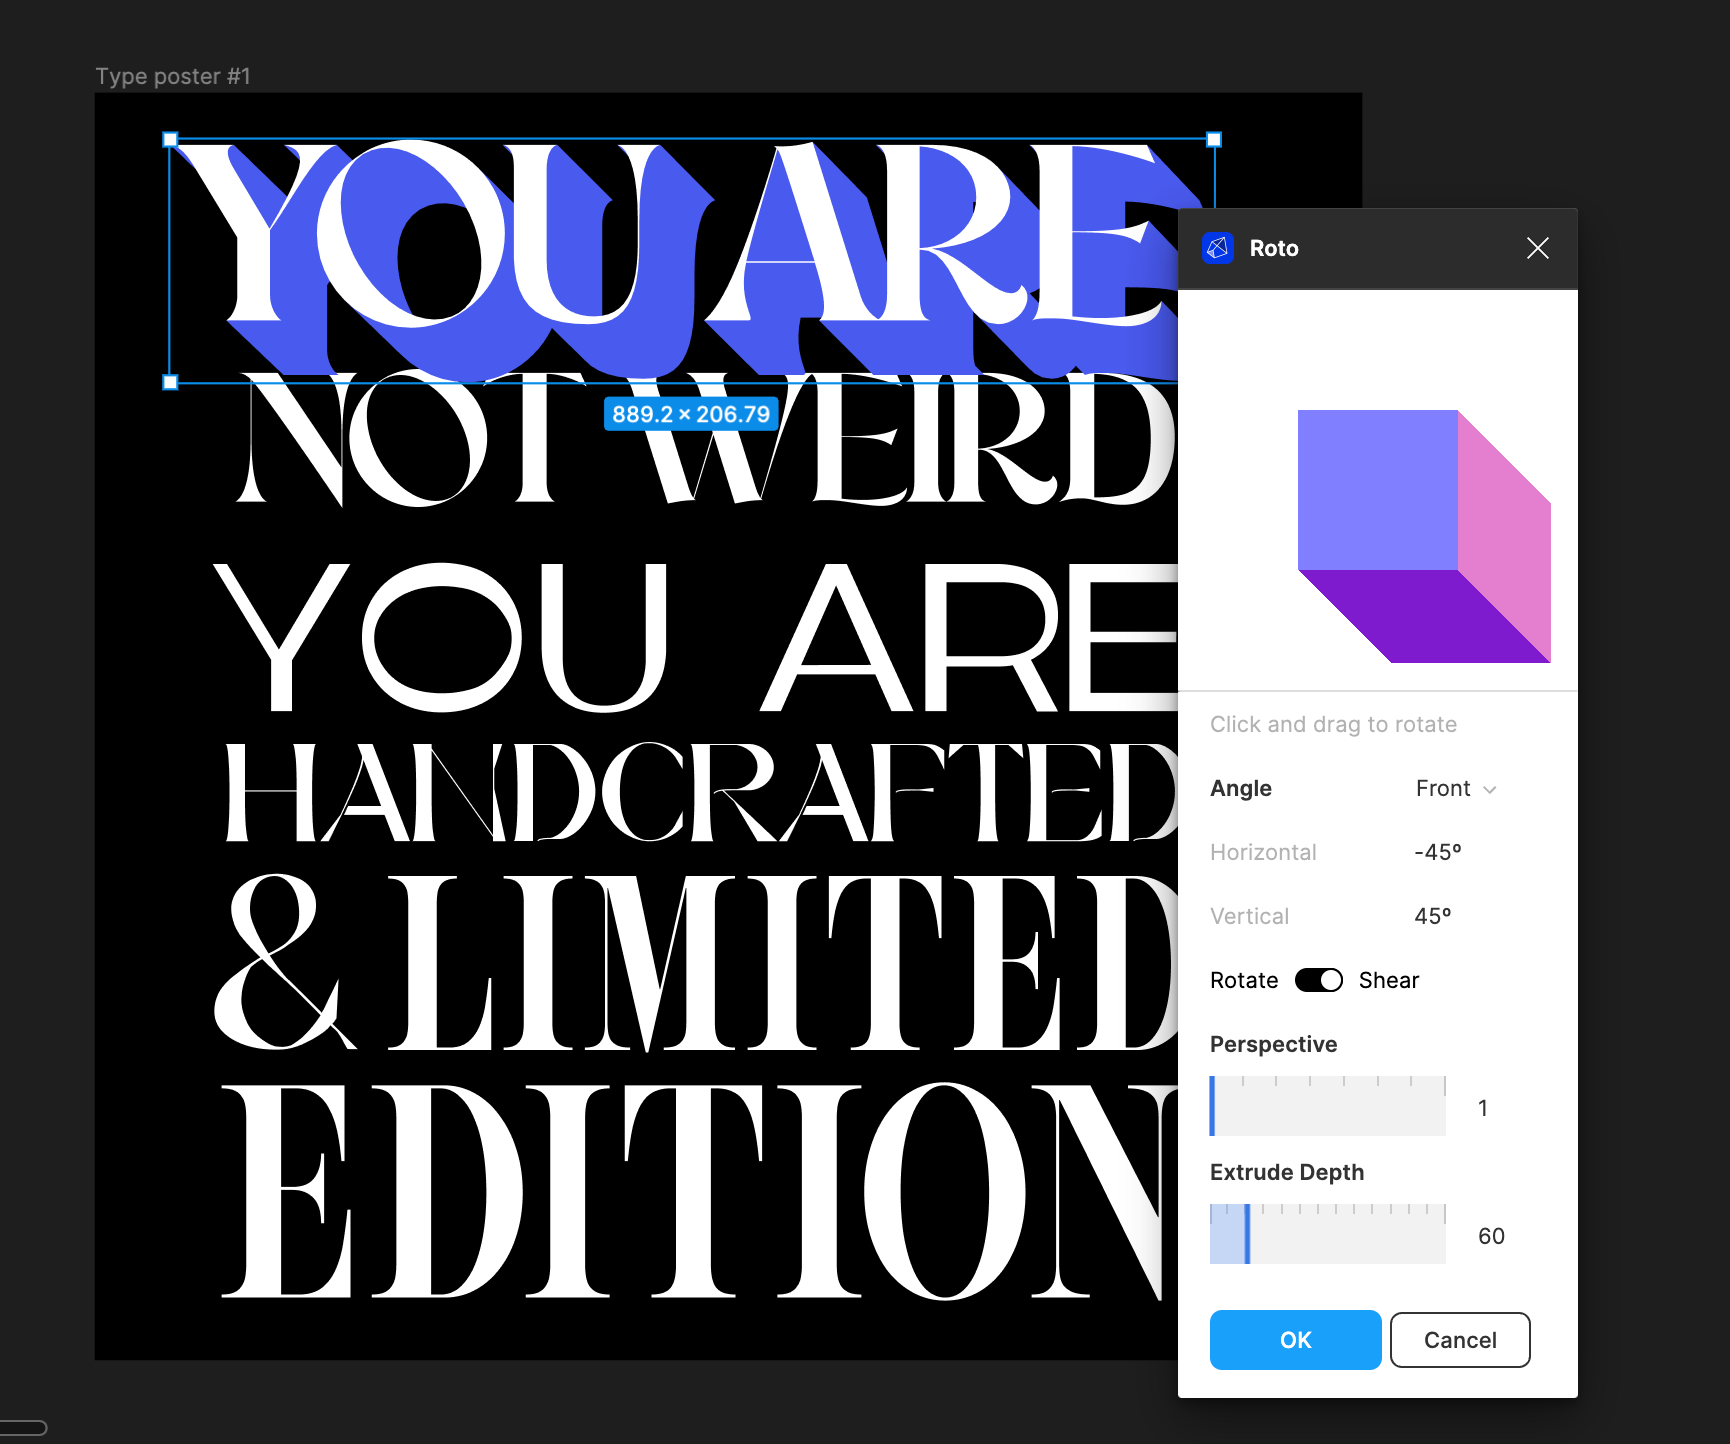
#2 : Select the first text block and run the Roto plugin
Extrude the selected text block by running the Roto plugin (it’s free)— copy the settings shown below; feel free to tweak Extrude Depth setting to your liking.
Do this for all text blocks, and change text and extrusion colors to your taste!
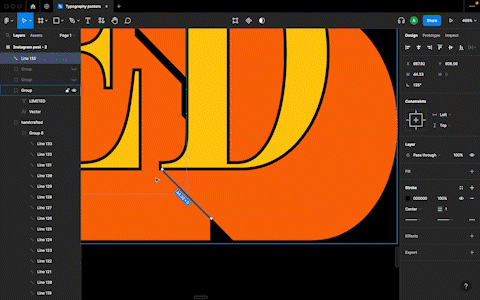
#3 : Replace the vectorized text layer (made by the plugin) with your original text blocks
#4 : Apply stroke to text blocks
You know what to do! I've chosen a 2px #000000 stroke.
#5 : Add outlines manually over the extruded parts with the Line tool (Shortcut: L)
Patience is key here. Hold the SHIFT key to keep lines at 45° angles. I've kept these outlines at 2px #000000 as well.
Voila! You've done it!
One last thing…
Before you go, here's your action item: If you liked this tutorial, subscribe for more (they’ll be delivered to your email as I write them), and follow me on LinkedIn — join me in my journey as I explore the world of design :-)
Happy designing! 🦄
Roto app isn't working on figma, have tried it on multiple systems. Would it possible to suggest alternate plugins?